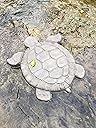
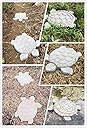
🐢 Step into style with every stone you lay!
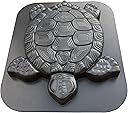
The Turtle Shape Stepping Stone Mold is a durable, easy-to-use ABS plastic mold measuring 15.75" x 13.39" x 1.5" designed for DIY garden enthusiasts. It enables the creation of personalized, artistic concrete pathways with no special skills required. Lightweight and reusable, it cleans easily and supports repeated use, making it ideal for crafting unique, long-lasting garden paths that elevate outdoor aesthetics.
| Best Sellers Rank | #380,115 in Patio, Lawn & Garden ( See Top 100 in Patio, Lawn & Garden ) #6,438 in Outdoor Statues |
| Customer Reviews | 4.7 out of 5 stars 1,187 Reviews |
I**R
Good quality
Good size and very sturdy! Love my turtles!
B**R
Awesome molds
I got this mold some time ago because my Wife loves turtles. I finally got around to making her stepping stones and they turned out perfect. I used quikret 5000 because of it’s durability. As you can see from the pic, the fact that it has stones in it does not effect the mold. To add strength, I cut chicken wire to fill the mold, especially the legs and head. Also, I made my mix somewhat watery to make sure all the details showed up. I used small batches of concrete. First to cover the bottom, then added the chicken wire, then covered the rest. This is one solid stepping stone that I have no fear of it crumbling. Don’t buy cheap concrete. It’s worth a few bucks more to get better concrete. I did not lubricate the mold at all, and while I had to work it a bit and bang my hand on the back, eventually the concrete slipped out of the mold. 7/28/22 update: So I tried making a second mold with quikcret without gravel (it’s all I had left and I didn’t want to run to the store) and it didn’t turn out well. One leg and the tail crumbled when removing. You can tell the concrete is not nearly as durable. Don’t worry that the gravel will effect the definition of the mold—it doesn’t. When choosing concrete, think “driveway” concrete. Don’t waste time and effort with concrete that will just disappoint. As I’ve said, the best concrete to use is the quikcret 5000.
D**L
Easy to use
First, it’s just a mold, so there’s not a lot that should be wrong with it. The plastic is thicker than I thought it would be and lends itself to reuse. After that, it’s all about the concrete you use and your method. As others have said, use Quickcrete 5000. For my first attempt I used some 4000 lb Quickcrete I had remaining from setting a post. I’m sure some of it had to do with only letting it set for 12 hours verses 24, but it crumbled coming out of the mold. I used the Quickcrete 5000 on the next, waited 24 hours and had much better results. I went ahead and invested in a concrete mixer to use in my drill and I’m able to mix the concrete in my bucket much more thoroughly. You need to pay attention to what you’re doing when using this mixer as it’s easy to sling concrete all over the place. I also purchased a 12 quart bucket with a pour spout on it, makes pouring into the mold easier. There are quart marks in the bucket and I’ve learned adding concrete just below the 4 quart mark gives me enough for the mold with little leftover waste. The only thing I’m not crazy about with this bucket, it’s not all flat on the bottom and I still need to use a painter’s stick to get the dry concrete in the groove around the bottom mixed in with the rest. Covering just the bottom with a little water before pouring the concrete in helps. Don’t ask me why I thought of this, it works well for us so far. There are numerous ways to add support in the mold for the turtle. I purchased some fiberglass mat and we cut it out in the shape of the turtle, slightly smaller than the turtle will be so it fits in the mold easily. After filing the mold half full and making sure the head, legs, and tail have concrete in them, we tap the mold to get as many bubbles to come to the surface as we can, now we lay the cutout fiberglass mat into the mold and gently tap it into place until it’s all wet. Then we add the remaining mixed concrete, taping the mold to get as many bubbles to come to the surface. It’s important to wait 24 hours before removing the turtle from the mold. I’ve been gently laying it over on the grass, working the back legs free from the mold first then the front legs and head, then rest just follows. This is were the thickness of the plastic can work against you a little, but I understand why it has to be this thick to support the finished turtle and not be all deformed when it comes out. I believe it says on the bag of Quickcrete 5000 it takes 28 days to cure to 5000 pounds. I’ve been wetting the finished turtles everyday when I water plants around the house. Hopefully this will help in the curing process and they will remain strong. We have our process down and this is what has worked for us on four turtles so far, two more to finish our path.
A**L
Cutest stepping stones ever.
Love this mold. It's rigid enough to be self supporting, but has just a tee tiny bit of give to make popping the turtle out easier. I spray it really well with olive oil, and after several successful pours, it still looks almost new. I'm using left-over concrete off the truck. Standard 4 bag mix with added fiber. I "giggle" the mold well to bring up air bubbles, then screed it well with a hand float. Easy cheese, takes maybe 90 seconds. I let it cure in the shade, wetting it with the garden hose several times the first day. I flip it and remove the mold after at least 24 hours, then let it cure a couple weeks in the shop before placing it in the garden. I look forward to many many more turtle stepping stones. Great product. No regrets.
A**R
Love this turtle 🐢
Love this turtle mold. My husband built a frame to put it in to make it a little thicker, which supports the legs. Listened to other reviews on how to make them, came out perfect!
J**3
Turtle Mold - Works great after trial and error.
This turtle mold is so fun. It makes great steppingstones once you figure out the process on how to make them so they don't break or get stuck in the mold. 1. Use a bit of pam in the mold, not a lot but enough that the plastic is coated. 2. Fill the mold 1/2 full and then put in metal to reinforce the stone. Especially on the flipper, head and tail. I tried chicken wire, nails, wire coat hangers. I had an old piece chain link fence that I cut up, that worked the best. Once you figure out the gotcha's this mold is fun and once you give one to someone everyone else wants one too!
M**K
Great mold!
This seems to be holding up well- sturdy. I've only made 5 so far, but see no issues with product durability.
C**L
Makes great turtles
I have made 10 turtles so far with this mold. It uses maybe half a 60 lb bag to make each one. Make sure to place it level and gently shake for less air entrapment. I used a cooking spray on the mold each time before use and it still works just fine. Don't be impatient let is set up a whole day. I also wetted mine during that 24 hours of setting to add to the strength. I painted one turtle with some left over green and it looks great.
M**A
Es muy resistente
Es ideal para piso en el patio, como decoración de ve muy hermosa, el plástico es muy resistente y de buena calidad
B**D
Amazing mold.
My mom loves this mold and is already making her 4th turtle with plaster of Paris. They look amazing and beautiful. Highly recommend.
C**T
Good quality
Very sturdy
R**Ú
Excelente
Queda muy bien
A**R
great product
Love it.. Works great once you have the hang of it..Fast shipping
Trustpilot
1 month ago
2 months ago