Desert Online General Trading LLC
Dubai, United Arab Emirates
Desert Online General Trading LLC
Dubai, United Arab Emirates

✨ Light up your world with precision and style! 💡
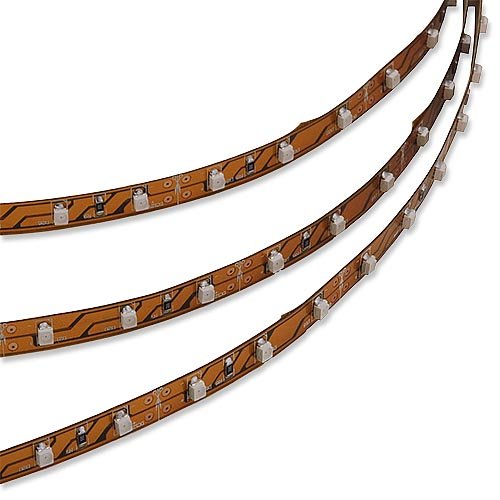
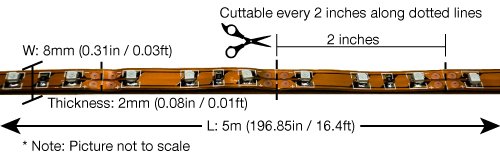
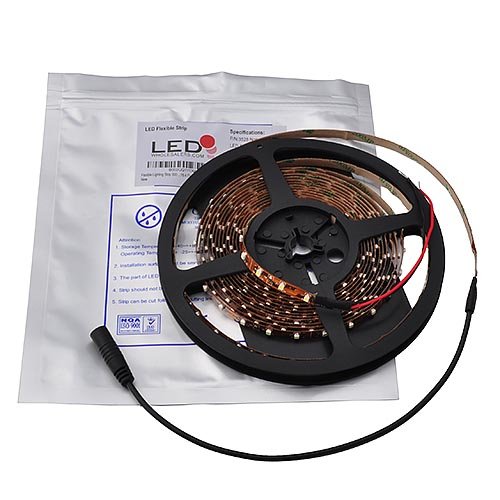
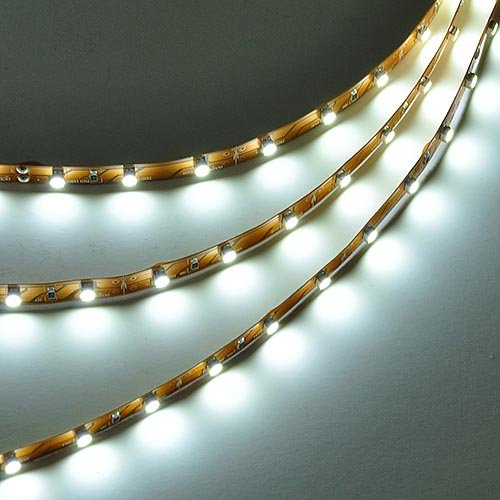
This 16.4-foot flexible LED strip features 300 SMD3528 LEDs emitting bright 6000K white light at 1000 lumens. Cuttable every 2 inches and powered by a safe 12V DC input, it offers energy-efficient, dimmable illumination with easy adhesive installation. Perfect for home, office, or professional lighting projects seeking modern, customizable brightness.
| Color | White 6000K |
| Brand | LEDwholesalers |
| Indoor/Outdoor Usage | Indoor |
| Light Source Type | LED |
| Power Source | DC |
| Light Color | Warm White |
| Theme | Tv |
| Occasion | Christmas |
| Style | Modern |
| Color Temperature | 6000 Kelvin |
| Number of Light Sources | 300 |
| Voltage | 12 Volts |
| Wattage | 24 watts |
| Included Components | LED Strip |
| Number of Items | 1 |
| White Brightness | 1000 Lumens |
| Control Method | App |
| Ingress Protection Code Rating | IP33 |
| UPC | 843048759208 783961690526 |
| Item Length | 16.4 Feet |
| Manufacturer | LEDwholesalers |
| Part Number | 2026WH |
| Item Weight | 2.89 ounces |
| Item model number | 2026WH |
| Is Discontinued By Manufacturer | No |
| Size | 16.4ft x 8mm |
| Item Package Quantity | 1 |
| Batteries Included? | No |
| Batteries Required? | No |
W**M
A Great Set of LEDs!
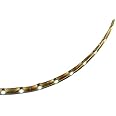
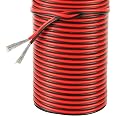
This is a fantastic product! For $11 I wasn't expecting much, but these are great. They're really bright, look great and come exactly as advertised. I would like to make a few notes for people who have never bought LEDs like this before, or are not experts at electronics. These will not just plug into the wall like a normal light would. Essentially at one end of the strip of LEDs there are 2 wires, a positive (red) and a negative (black), which will be hooked into a power supply. If you want to plug these into a wall outlet, you're going to need a power converter.I have these hooked into my car amp and have them mounted under my seats and on the edge of my doors with a toggle switch. When the bass hits (really when my amp outputs power) they light up in tune with the bass. One issue with this is that these require a bit of power to first get them going, so I need to have the volume up a bit higher than I would like, but it's fine. I'm not taking any points off from this, I'm just mentioning it just in case someone else considering this product had the same application in mind.The wires that this comes with are extremely thin and actually somewhat hard to strip. I only own one pair of wire strippers and they don't handle this thin of wire. I ended up stripping them with a pocket knife because I didn't want to spend a ton of time stripping them, but it's worth noting. I'm assuming this wouldn't have been an issue if I had the right set of tools.The adhesive backing is 3M brand and it holds well, but not as well as I would like. I live in an area when it gets cold in the Winter, and the cold seems to weaken the adhesive. I might go with some more heavy duty adhesive for this particular job, but I'm assuming the adhesive this came with wasn't meant for this type of application, so I surely won't take off any stars for me misusing the product.Interestingly these are able to be cut, and they have lines marking where they can be cut, but I don't see this mentioned in the product description at all. I'm not sure if you can re-use the cut sections since I didn't actually need to cut them (and, for the record, I am not an electronics expert by any means), but it would definitely take some work to do so, since you would have to add positive and negative wires coming out of the cut sections. I just think it's worth mentioning (and other reviewers have actually mentioned it, but for the sake of completeness I will mention it again).One thing to note is that while these are indeed flexible, bending them into a circle or arch shape is troublesome, especially if you want one with a small radius. I had an extremely hard time bending these around the shape of my car and ended up folding them to finally get them into the shape I wanted. They still work though which was really surprising to me; they're very tough. I bent, twisted, folded, and even stepped on these a few times and they still work just fine!As for the seller: I didn't have any issues and received the product on-time. I ordered 2 of these at once and they were individually packaged but shipped in the same envelope which was really great; the less things I have to worry about carrying back from the post-office the better.Overall, this is a great product if you know what you're doing with them. I originally ordered 2 and they both came in perfect working order and I am definitely considering buying more if I can find another project to use these with.
L**M
Perfect inexpensive under cabinet DIY lighting (and new to soldering)!
***Note: I am new to soldering so this review is both for the lights AND my experience soldering them!***I'd been researching under cabinet (UC) lighting for a while when I stumbled upon LED light strips. I was looking for a CHEAP replacement for my halogens and was open to expending some effort if it saved me money. These light strips seemed ideal because they could be cut and rewired (soldered) together to create spacers - which I needed to accommodate because of cabinets joints and a 30" gap with the microwave. I’d never soldered in my life but enjoy DIY projects so decided to go for it. Read reviews, researched soldering, and watched YouTube videos…got myself a soldering kit ($17), some copper wire ($6), some heat shrink tubing ($8), and a soldering “helping hand” ($7) in addition to these lights ($12) and an adaptor ($9). With Prime, total cost was just over $60.Soldering isn’t easy because it requires 4 hands and I only have 2, but I cut a few strips and stripped some wires and practiced before doing the real thing. LESSONS LEARNED from this experience:- Measuring and precutting the strips and wire was essential so you can solder everything on a flat surface rather than in midair as you go. I tried the midair tactic and I’m still sore.- Best method (for me) involved putting a dot of solder on the strip’s circuit and some on the exposed copper wire end(s), then taping each piece to a board (my “work bench”) so they overlapped and wouldn’t move while I soldered them together.- Peel back the sticky tape just a wee bit before soldering so you don’t melt it – also helps to keep it in place when soldering.- Make sure the strips you’re connecting are both going the right way! I soldered everything together and then belated realized (when a strip in the middle wouldn’t light up) that one of my strips was “backwards” or flipped. (This is the equivalent of making sure you don’t cross polarities.) Novice way to do this: always have diagram of scissors on the strips point the same direction as you solder.- Recommended putting pieces of heat shrink tube on the wire BEFORE soldering each end to a strip so you can use slightly smaller pieces of it. And a powerful hair dryer works quite well for shrinking it.- Invest in a soldering stand. I was very careful but still managed to burn myself.As for the lights, I can only repeat what other rave reviews have said: these are powerful little beauties that give off NO heat. Their stickiness does leave something to be desired, however – will look into reinforcing it as next step (got masking tape over the heat tubing for now). But overall I couldn’t be more pleased with the results. These would be perfect for installing in dark areas like closets and INSIDE cabinets – which will be my next project!BTW, I bought both 4000K and 3100K since I wanted to avoid a yellow-ish hue. The 4000K was a wee bit brighter but too starkly white while the 3100K was perfect. In fact, for those who really want a warmer glow, the 2700K would probably be fine.
Trustpilot
3 days ago
1 day ago