


Desertcart purchases this item on your behalf and handles shipping, customs, and support to South Korea.
๐ Power your smart projects with the ultimate mini WiFi dev board!
The 5pcs ESP8266 ESP-12/ESP-12F NodeMcu Mini D1 Modules are compact, Arduino-compatible WiFi development boards featuring 4MB flash memory, 11 digital I/O pins with PWM/I2C/interrupt support, and a micro USB interface. Ideal for professional makers and IoT developers, these boards deliver reliable 802.11 b/g/n/ac wireless connectivity with built-in power protection, enabling rapid prototyping of connected devices.
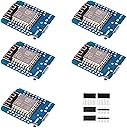


| ASIN | B081PX9YFV |
| Best Sellers Rank | #203 in Single Board Computers (Computers & Accessories) |
| Brand | ACEIRMC |
| Built-In Media | esp8266 d1mini |
| Compatible Devices | Arduino, WeMos |
| Connectivity Technology | I2C, USB, WLAN, Wi-Fi |
| Customer Reviews | 4.5 out of 5 stars 776 Reviews |
| Included Components | esp8266 d1mini |
| Manufacturer | ACEIRMC |
| Memory Storage Capacity | 4 MB |
| Mfr Part Number | 10550 |
| Model Name | D1 Mini |
| Number of Items | 5 |
| Operating System | Linux |
| Processor Brand | Espressif |
| Processor Count | 1 |
| RAM Memory Installed | 4 MB |
| RAM Memory Technology | LPDDR3 |
| Ram Memory Installed Size | 4 MB |
| Total Usb Ports | 1 |
| UPC | 701715431645 |
| Warranty Description | 1 |
| Wireless Compability | 802.11a/b/g/n/ac |
J**E
Simple WiFi connectivity for tinkerers
This works fine! I was worried that the tools setup would be a chore, but just go to the ESP8266 project on GitHub, which tells you where to put in a board manager link in the Arduino IDE, and then select the WeMos R2 & Mini board in the setup menu, and you're good to go! If you're not already familiar with programming at the C level in general, and/or Arduino-type programming, getting started on this particular board will probably be rough, though -- it's not as "easy on-ramp" for beginners as the plain Arduino, or the Teensy series, but that's not what I was looking for, so that's fine. Two things to watch out for: 1) The pinout in the pictures of this listing are FROM THE UNDERSIDE of the board. If you solder on the connectors as if that was the overside, you'll end up with a board whose pins are mirrored from what all tutorials and symbols on the web expect. 2) You'll probably want to double-clock the CPU to 160 MHz; there's an option for this in the board setup menu. This wasn't clear in most of the setup instructions, but it works better, connects faster, can do HTTPS / SSL better, and so on, with that option turned on. Beware that it draws up to 200 milliamps from the 3.3V rail when actually connected and transmitting, so if you want to battery power it, you need a big battery or some way to only occasionally turn this on (or both.)
T**Y
Great deal on a sweet product.
Received the product in a few days with each chip packaged in anti static bags. A nice added bonus is the extra I/O pins that can be soldered based on your application. For a little over $3 ea, I think this is the most versatile of the 8266 chips. Iโm just getting started back into electronics (Iโm 70) and these are so easy to apply into IOT projects with a huge support community. I was able to put together a temp humid web server in a matter of a couple hours. Highly recommend this seller as he also reached out to me after the sale to insure all was ok, and an email address if I should have questions. Iโve received no free products or incentive to write this review.
M**E
Executes the timed deep sleep instruction reliably
I needed a new ESP8266 module that would reliably execute the timed deep sleep instruction. I use the Arduino IDE for programming and followed the instructions in some of the reviews and on the sale page itself under Product description. Three points: 1. Initially I was not able to upload a sketch to the device. I'd followed all the instructions including the board selection of either the LOL(WEMOS) D1 R2&mini or the NodeMCU 1.0 (ESP-12E Module) - neither worked. Maybe because this module is an "F" not and "E". So, I selected the NodeMCU 0.9 (ESP-12 Module) and it worked and now uploads ever time. 2. My previous ESPP8266 module's A/D input was limited to 1.0 volt; this one allows 3.1 volts on the A/D input. 3. I tested the timed deep sleep instruction over a 24-hour period (with D0 wired to the reset pin), and it functioned properly every time. I have used only one of the 5 modules received, so I haven't verified they all work, but the first one is working nicely.
B**E
Awesome value for tinkering with wireless projects
Using these for various LED projects, and man what a good bang for the buck. All 5 modules I received tested and work fine with my WiFi. I am taking off one star for not providing adequate instructions for installation to get this thing up and running. For those having issues with not detecting the device when plugged in.. **MAKE SURE YOUR USB CABLE IS FOR DATA, NOT ONLY CHARGING!** I wasted several hours messing with Windows and trying to install drivers for CH340G, didn't even dawn on me that the cable could be the problem. After trying about 6 different cables in the house I finally found one that worked, and everything worked fine after that. I'll post instructions for anyone having trouble -- these really should be part of the description (not just "install drivers" and "install board to Arduino IDE"). Installation for drivers only: 0. Ensure you have a DATA micro USB cable (typically one that came with a phone should work -- mine came with vapes and so only supported charging). 1. Try plugging in the board without installing drivers -- if you hear the connection sound for an external device you are good to go (skip to 3). 2. If you need drivers, SparkFun has them hosted (official wemos site seems to be down) -- I can't link to them but search google for "sparkfun CH340 drivers," and the first result should be "How to Install CH340 Drivers" 3. Verify you can see the device: open Device Manager --> Ports (COM & LPT) --> USB Serial CH340 (COMXYZ) Getting setup in Arduino IDE: 0. You will need a link to copy and paste, but I can't link it here. Search Google for "arduino ide esp8266 board manager" -- the first result should be for a "readthedocs" website, and that should have all the instructions you need. However, for clarity I will list them here as well. 1. Ensure you have Python installed (this might be optional -- I haven't installed Python directly, but I installed the Arduino IDE and had no issues). 2. Open the Arduino IDE and go to File --> Preferences 3. Under "Additional Board Manager URLs" at the bottom, paste the link (it's to a JSON file) you copied from the other page into that box and hit "OK" 4. Go to Tools --> Board --> and select Board Manager (near the top) 5. Search for "ESP8266" and install the result (should be from "ESP8266 Community") Selecting the board for your sketch: 1. Go to Tools --> Board and select either โLOLIN(WEMOS) D1 R2 & miniโ or "NodeMCU 1.0 (12-E Module)" โ either of these worked for me 2. Be sure to select which COM port the board from Tools -> Port 3. Check that the upload rate is 115200 (it should already be) Test the board with "Blink": 1. Go to File --> Examples --> ESP8266 and select "Blink" at the top 2. You shouldn't need to change anything, so click Upload 3. Once it's finished, check that your blue led light is blinking Test the board's WiFi with "ArduinoOTA": 0. This isn't necessary, but to be sure your WiFi module actually works you need to try connecting 1. Go to File --> Examples --> ArduinoOTA and select "BasicOTA" 2. Only changes you have to make are on lines 7 and 8 for your WiFi SSID and password 3. (Optional) Save the sketch 4. Go to Tools --> Port: If all was successful, you should be able to see the ESP8266 board here (COM whatever) -- select it 5. Hit upload and open the serial monitor 6. Once the program is finished uploading, make sure to change the baud rate to 115200 on the serial monitor 7. Check to make sure you get the "Ready" message, followed by an IP address Hope this helps everyone, this really is a bargain product but without installation instructions it's infuriating.
C**H
Works, and cheap. Cant ask for more
Arrived fast, flashed with ESP8266 Micropython in Thonny and I was up with webrepl in about 5 minutes
S**O
They work
Some arduino products (based on NINA wifi) simply don't work reliably. This seems to work perfectly. Note: this isn't the board's fault, but the Arduino IDE takes some setup to talk to these, and the latest version (3.1.0) of the board manager package does not work. You get an incomprehensible error message about time_ns and things fail to compile. Drop back to 3.0.2 and all is well. This sort of thing isn't atypical with Arduino projects, which seems to be very much the wild west in terms of software,
D**D
8266 is a great chip, but the CH340G USB is hit or miss
Editing and adding two stars. The last batch I got performed flawlessly with MicroPython 1.19 firmware. These are wonderful and cheap little 8266 boards, but the CH340G USB to UART bridge really drags them down. Can't get the thing to flash? Try a different USB cable. Got garbage characters on your serial output? Try a different USB cable. Yeah, really. The USB cable can make a difference. I don't know if it's the CH340G or the CH340G driver for Windows, but something is not quite right. My experience using the same USB cables with NodeMCU and Adafruit Huzzah32 (and their CP2102 USB to UART bridges) is stable and working consistently. These were a great price, but not worth the headaches. Stick with a CP2102 equipped device.
D**I
Might be an older chip but they work well for a lot of use cases!
I love these chips. They are very useful and I have used them for a few things now and though they don't have a ton of memory and their processing speed is lower than things like the ESP32, I still prefer them for certain applications. Built a few WiFi enabled thermometers with these. They sit in various rooms of my house and sense the temperature and I can hit a little webpage I coded into the device to see what the temperature is where they are located. So basically, they are acting as remotely readable temp/humidity sensors. Also, I used these to build a controllable outlet where I can log into a webpage on it over the network and control the on/off state of an outlet. Then I modified the code so it would reach out to the remote thermometers I mentioned to get the temp and turn on/off the outlet based on the temp. This way they control a heater in my shed to keep the temperature stable through the winter. It has been working great!
Trustpilot
2 weeks ago
2 weeks ago