




MG Chemicals 8331 Two-Part Silver Conductive Epoxy Adhesive
Details
- BrandMG Chemicals
- Specific Uses For ProductElectronics
- MaterialEpoxy Resin
- Compatible MaterialMetal Plastic
- Item FormPaste
Details
- BrandMG Chemicals
- Specific Uses For ProductElectronics
- MaterialEpoxy Resin
Description
⚡ Stick with the Best: Elevate Your Projects with Silver Conductivity!
- QUICK CURE TIME - Get your projects done faster!
- SYRINGE PRECISION - Easy application with no mess.
- SLEEK SILVER FINISH - Aesthetically pleasing and functional.
- UNLEASH YOUR CREATIVITY - Perfect for electronics and electrical projects!
- METAL PLASTIC COMPATIBLE - Versatile adhesion for all your conductive needs.
The MG Chemicals 8331 Two-Part Silver Conductive Epoxy Adhesive is a high-performance adhesive designed for electronics and electrical applications. This epoxy resin is compatible with metal, plastic, and other conductive surfaces, ensuring a strong bond. Packaged in a convenient syringe for precise application, it offers a sleek silver finish and quick curing time, making it an essential tool for DIY enthusiasts and professionals alike.


Specifications
| Asin | B003BDMJSY |
| Brand Name | MG Chemicals |
| Colour | Silver |
| Compatible Material | Metal, Plastic, Conductive Surfaces |
| Container Type | Syringe |
| Customer Reviews | 4.4 4.4 out of 5 stars (280) 4.4 out of 5 stars |
| Global Trade Identification Number | 00779008833117 |
| Item Form | Paste |
| Item Package Quantity | 1 |
| Item Weight | 14 Grams |
| Manufacturer | MG Chemicals |
| Manufacturer Part Number | 8331-14G |
| Material Type | Epoxy Resin |
| Model | 8331-14G |
| Number Of Pieces | 2 |
| Other Special Features Of The Product | Conductive |
| Specific Uses For Product | Electronics, Electrical |
| Upc | 779008833117 |
| Volume | 6 Millilitres |
| Warranty Description | no warranty available |
Reviews
User
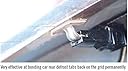
Fixed my Defroster tab!
I originally brought several defrost repair kits at my local Auto shop. Although they did work, they only lasted about a week or two before the tab ended up falling off again. I ended up searching the internet for alternatives other than buying a new back windshield. I tried conductive tape and liquid solder sold at lowes.. both didnt work at all. Finally gave into buying this, since the price was pretty expensive. Just wish I ran into this sooner instead of spending 40+ dollars on other alternatives. The epoxy when used correctly hardens like concrete while keeping electrical conductivity.Here is step by step on how I fixed my defrost tab on my 04 Toyota Solara.-Remove drivers side rear glass panel by using a panel popper.-Remove tab from wire.-Remove solder on bottom side of tab that will attach to window. I initially tried to use a solder gun but found using a drill gun with a wire brush attached 'sanded' the excess off with ease.-Clean tab and location on glass with rubbing alcohol. Make sure the new location is not the same one where the tab fell off.-Use a small vice grip to hold the tab. I found a great location where I was able to use the back seat top cushion to jam the vice grip to help hold the tab to the glass window. It was very sturdy.-Grab a piece of cardboard and a stir stick. Squeeze out epoxys at a 1 to 1 ratio(1 black tube 1 white tube), I only ended up using maybe 1/4 of the tube. Stir very well. It will take a while for the epoxy to harden, so no need to rush.-Use stir stick to generously apply the mix to the tab. (I put a small amount on the bottom) Make sure you spread it around to contact the circuit on the glass.-Use a hair dryer to help harden the epoxy. Very important: Dont mess with it while it is drying! I propped up a hair dryer and set it to low heat since it was only about 6 inches away from the tab. Left it on for 20 min. Came back and the epoxy had hardened.-Remove vice grip and reattach wire to tab-Test with multimeter before reattaching panel.Enjoy your great work!
User
Too expensive for an outdated product
The new product from MG is much better at the same price! This is way too expensive for what you get
User
The best there is.
This is the Real thing. If you need to repair your rear defogger, this is what you need. Be aware that to do a great kid, you need to cure the conductive epoxy for 15 minutes at 65 degrees Celsius with the help of a hot air gun and a digital thermometer. Well with the price. Dealer what end to change my rear window on my new Jeep. Not covered by warranty. This repair is stronger than the original weld. Great. Love it.
User
Delivers!!!
It brakes down like this: If this stuff was cheap, the soldering iron would be a thing of the past. Wait, there is more. This seemingly simple product is specially remarkable when you consider alternatives. The other day I bought a cheap one, that sells here, only to find out I wasted time and money. It is amazing how a simple concept can give birth to so many scams. It is like back in the far west days when traveling "salesmen" would come to small towns offering people the elixir of ethernal youth. Only now it is called wire glue... This one is the real deal. If you find one as good as this one but cheaper, let me know.
User
Silver Epoxy instead of soldering for connecting replacement battery of a Norelco shaver
Silver epoxy made battery replacement for a Norelco shaver a cinch, without need for soldering equipment, but you may need a heat gun to fast-cure the epoxy. I saved my shaver from the landfill.Norelco shavers are not manufactured with battery replacement in mind. Replacement requires desoldering the old battery and re-soldering on a new replacement battery. The factory solder is located in the hidden back side of the circuit board, and not easily accessible. Flipping the circuit board over to reach these soldering locations can easily damage the delicate copper foil electrical connections coming off the circuit board. Besides, to solder, you need soldering iron, flux, solder, desoldering pump, and probably magnifying glass with light.The general principle here is not to solder and not to disturb the circuit board at all. Cut old battery connectors at mid-length to remove the old battery. Use silver-epoxy to glue together the old connector stubs and the new battery connectors.Detailed steps are as follows:(1) Use a T7 Torx screwdriver to remove the two screws on the Norelco shaver’s back. Remove the back cover to expose the battery. No further disassembly is required.(2) Pull old battery part-way out of its plastic mount to expose the two flat connector strips, which are factory-soldered on the circuit board hidden under the battery mount.(3) Cut the old battery connector strips close to the body of the old battery, leaving the stubs long. These stubs will then be epoxied to corresponding connector strips from the new battery.(4) Measure and cut connector strips of the new battery to the appropriate length, leaving enough length for the new connectors to overlap the old connector stubs. Adjust and bend connectors as needed to ensure good contact before applying epoxy.(5) Mix epoxy in well-ventilated area. Wear gloves. I used less than 1/5 of the volume of epoxy supplied, totaling less than 1mL from each of the two syringes.(6) Use a needle or some other small narrow tool to apply silver epoxy to the old connector stubs first.(7) Snap new battery into plastic mount. Make sure new and old connectors overlap, with epoxy in between.(8) Apply more epoxy to envelop the overlapping battery connectors.(9) Make sure there is no epoxy bridge between the two poles. Any small trace of epoxy connecting the two will cause a short. This happened to me.(10) Use heat gun for 10 to 15 minutes to cure the silver epoxy. Official temperature for fast-curing is 90°C for 12 minutes, or 125°C (above water boiling temperature) for 7 minutes. Heat gun works best. Hair dryer on high may also work. I do not recommend baking the shaver in the even, risking damage to the electronic components and possibility of later food contamination. I turned my heat gun up to where it feels fairly hot to my hand at 12 inches, but short of burning myself.The actual battery swap should take no more than 30 minutes. However, it took me 3 to 4 hours to figure out how to do it with epoxy without extensive disassembly and without soldering.As of date of the original review, 10/27/2021, it is barely cost-effective to replace the Norelco battery, instead of buying a new shaver. In my case, silver epoxy costed $49, replacement battery $13, for a total of $62. A new waterproof wet-dry Norelco shaver costs around $130. A non-waterproof Norcelco can be as cheap as $30. Mine is a wet-dry waterproof one, so I saved around $68. Most of all, I prevented my 10 year old Norelco from going to the landfill.As of 01/27/2023, the shaver is working fine. Heat from charging and discharging the battery has not caused noticeable disintegration of the silver epoxy by inspection.
Common Questions
Trustpilot