🎮 Upgrade your nostalgia with a sleek shell that’s built to impress!
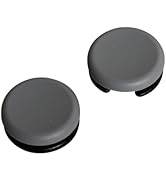
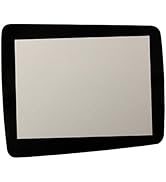
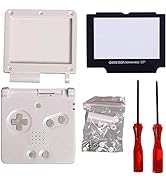
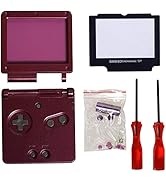
The Timorn Full Parts Housing Shell Pack is a comprehensive replacement kit for the Gameboy Advance SP, featuring a durable black plastic shell, a new lens screen with protective film, and essential screwdrivers. Designed for easy DIY installation, it restores your console’s look and function, making your classic handheld feel brand new and ready for endless gaming sessions.
| ASIN | B01M9AYY1P |
| Best Sellers Rank | #31,281 in Video Games ( See Top 100 in Video Games ) #407 in PlayStation Vita Games, Consoles & Accessories #458 in GameBoy Advance Games, Consoles & Accessories #565 in Nintendo 3DS & 2DS Accessories |
| Brand | Timorn |
| Brand Name | Timorn |
| Color | Light Blue Pack |
| Compatible Devices | Video Game |
| Customer Reviews | 4.3 out of 5 stars 1,946 Reviews |
| Finish Type | Glossy |
| Manufacturer | Timorn |
| Material | Shell |
| Model Name | GBA SP |
| Number of Items | 1 |
| Part Number | T221 |
| Screen Size | 6.5 Inches |
| Screen Surface Description | Glossy |
| Unit Count | 1 Count |
R**R
Fantastic.
I am a huge Pokémon fan and my go to way to play is on the Gameboy Advance SP. Someone gifted me their old SO, complete with scratches, and a broken hinge. Considering I got it for free, I decided to purchase one of these shells, thinking what's the harm, even if I mess up I've only lost a broken gameboy. Let me say though, I love this shell. It looks great and Nintendo never made one like it which makes me appreciate it even more, with that being said I'll give a couple pieces of criticism. One, the screwdrivers it came with were small and slippery, making it hard for my big hands to keep a grip on, but nothing impossible to deal with. Also, not to this company's fault, but I will say when it comes to installation the ribbon cable was the most challenging part, it took me a good half hour. You definitely want to look up instructional videos on YouTube. My final gripe is the power switch button is a little sticky, so I ended up using the one from the original housing, no big deal. But hey, for how much this shell was, I'm really not complaining, again, it's fairly simple to install and looks awesome, I play it way more than my original SP now. It was a fun install and I'm definitely going to do more, I highly recommend this one and any other color from this company. For the price, 5 out of 5 stars.
F**E
2022- Perfect for the price to resurrect old gba sp
At first glance this item is perfect, sufficiently sturdy, evenly painted and everything fits perfectly. Upon inspection, you’ll realize that it’s cheaper brittle plastic, and that you’ll probably want to use as many original screws and buttons as possible. It will likely not survive a fall. But I bought this knowing that from the reviews. Nothing was missing and everything fit right. The hinges installed as expected. However, for the price and for my expectations to minimally use a nostalgic legacy machine for the kiddos in the car, it’ll probably last for the life of the gba sp and looks great.
S**.
Solid Product, Only Minor Complaints
Overall, I'm happy with my purchase. The order came with nearly all new parts, and with all the equipment I needed to start and complete my shell replacement project. I just have a few minor words of caution 1. Obviously, replacing a GBA SP shell isn't easy, so please don't expect it to be. For reference, it took me probably 2-3 hours to complete the project. At the same time, it's not too hard either, just follow a YouTube tutorial and you should be alright for the most part. 2. There was a small bit of plastic left over in one of the screw holes. I had to go in with a fine and sharp mini tool (a screw driver actually) to cut the plastic out so the screw could go in properly. 3. This kit doesn't come with new hinges (it comes with new hinge caps, but not new hinges), so you'll have to use the ones in your old SP shell 4. It didn't come with a sticker to put on the bottom of the SP (the one with the serial number and model info.). Like I said, this is a solid product and definitely recommend it if you're looking to replace an old, beat up shell.
G**3
Impressive
With a small amount of trimming, this shell is great. Pricier than other options, though it is well worth it. Everything lines up nicely, screws are the proper size/type, plastic seems quality, and the color pops in a similar way to oem shells. 9.5/10 would recommend.
T**C
this is a good replacement. New buttons and d-pad work good and ...
Had to replace my case due to smashed hinge by two year old :). Pro's: Plastic shell is of a decent material and the heft and look are spot on compared to the original shell. If you have a cracked or damaged shell as I did, this is a good replacement. New buttons and d-pad work good and the rubber gaskets provided are as good a quality as the original. Did not use the screws provided as I read of issues in the previous reviews but the screws taken from the broken gameboy fit perfectly and all is well. The rubber nubs for the screw holes and the replacement nintendo logo and warning stickers are a nice quality. It also came with the two screwdrivers need for anything which was nice. Cons: Replacement screen shield is crap. I rubbed some dust off with my t-shirt and scratched the hell out of it. Don't bother swapping if your original screen is in good shape. Did not come with the screen hinges so I had to hammer out the originals from the broken gameboy. Serious pain in the ass. All in all it worked good for what I needed it for but only just. If you're looking to just swap shells for cosmetic reasons I would advise against it.
J**N
Great shell for the SP
This case was relatively easy to install. I’d recommend watching a quick YouTube video just because you have to disconnect the screen from the board. Only issue I have with the shell is the small accent piece on the front, where the joint is doesn’t seem to sit very flush. I’ve tried different screws and it’s still doing it so I’m assuming the piece is a little bowed. Not a big issue, don’t notice it unless you’re looking for it from a specific angle. Overall it’s a great case, I got white and it looks almost silver. Seems to be like a satin white. I do wish it came with stickers for the back! But I can order some.
C**W
A Very Useful Purchase, But Buyer Beware!
Firstly, I’d like to say that this item is exactly what I was hoping for. Mine arrived in amazing condition with no scratches at all and with all the parts. With about 15 minutes of YouTube, I was able to disassemble and reassemble my GBA in a new shell. Simple enough, however, make sure you do it right the first time. I’m not sure if my technique with such small tools is just flawed, or if these screws are just very easy to strip, but it is very difficult, even with a rubber band, to remove these screws. Again, I may be the problem here. I didn’t even know you could strip screws unless you were using a drill. I’ve never managed to do that before I tried to put my GBA in a new shell, but it was nearly effortless. Be very careful and don’t try to do this on your own/without a guide or video unless you’ve done it before.
A**L
A Nice Looking upgrade for an old SP
Just got this shell put on last night and it looks good! However, I'd like to leave a few considerations: 1. If possible, use the buttons and screws from your original shell This is just a good idea in general when working with any aftermarket parts. I have read multiple reviews for several different shells (although they are probably all made in the same 1-2 factories) where folks have had screws to strip out on them. My screws were still in good shape from the original shell so I used those. If your screws are covered in rust / grime, you may want to use the screws from the kit. If you do, just exercise caution and feel the tension on the screw as you drive it in. Don't force anything. If it feels like it won't fit, either stop and return the case or use a small drill / file to work the screwhole. Buttons with the kit seem ok, but it was obvious my buttons had plenty of life left so I am keeping the ones from the kit as spares. I did have to clean the rubber pads as there was just a little dirt on them. 2. Be abundantly careful with the hinges when removing from the original shell You'll find this bit of advice on many reviews and videos but it's no joke. Pop the hinges out in an area where it will be easy to find them on the floor. I had to apply so much force to get the hinges out that they shot across the room like a bullet. Luckily, no damage was done to them. I used a combination of tweezers (to close the plastic flanges as much as possible) and a small phillips head screwdriver to push them out. Also, when installing back into the new shell, be prepared for the little plastic bumpers on the ends to keep coming off every time you try to pop them on. I was able to finally get them in by pushing down on a mousepad and applying force downward and in the opposite direction of the plastic slot on the hinge. This prevented the bumper from popping off and finally gave the "Click" I was looking for. 3. As others have stated, there may be imperfections on the shell. These do not have the same level of QC as Nintendo did with the originals. While mine is in better shape than some I've seen described, I can attest that if you look closely, you will see some differences from the factory shell. Mine did not have any detectable surface scratches as I have heard about with some, but a couple of the speaker holes seemed mismatched in size and were not cleanly bored out or filed. This is not a big bother to me but wanted to mention it. 4. The kit comes with a replacement screen lens. Don't try it unless you are 100% confident you can do iit and it is 100% necessary. For some dumb reason, I was thinking in my mind that the screen lens on the original would gently lift off of the front of the screen after it was removed from the case. Instead, it is held to the front of the screen with the adhesive strength of 1,000 barnacles. There is a reason why there isn't an abundance of info on replacing these lenses. I have seen a couple videos where folks risk ruining the screen with a heat gun and saw away at it with fishing line :o Unless your screen is bad off, just don't try it unless you have a spare. I wound up forgoing this process as the original only has superficial marks. 5. This will likely take you way longer than the folks on Youtube. Especially if you have large hands. I have BIG hands which means it was very difficult working with these TINY parts. All told it was about a 2 hour project for me to get the new shell on. I went very slowly and had to stop and take several deep breaths to keep rom breaking things (looking at you, Hinges from hell!). However, I feel that moving at a crawl and being overly cautious paid off, as I did it right the first time and did not have to open it back up. I wore nitrile gloves while working so as not to leave any extra fingerprints or debris on the screen or other sensitive areas. Someone on Amazon mentioned that the screwdrivers were slippery, they are absolutely telling the truth. Aside from the fact that the screwdriver heads are actually a bit too big for the screws, trying to turn them with gloves on felt like trying to twist a stick of warm butter. If you already have a small phillips and tri-wing driver on hand use those. Additional Notes: Replacing the shell is a good time to look at your battery. Mine was the original and was actually a bit swelled. I am replacing it with a KMD battery to prevent a small Chernobyl from ruining my hard work. If you are planning an IPS screen upgrade, it is my understanding that these shells will work if you trim the small strip of plastic that runs along the left side of the screen are of the shell. As many have stated, the serial number sticker does not come with the kit. This doesn't bother me, but might throw some folks if they find this important.
M**A
Mein GBA sieht aus wie neu :-)
In dem Set ist alles enthalten was zum Umbau benötigt wird. Der Umbau gestaltet sich mit Videoanleitungen im Internet relativ leicht. Das Material ist ein wenig weicher als das Original und man muss beim Umbau aufpassen es nicht zu beschädige aber beim Gebrauch im Alltag stellt das absolut kein Problem dar. Das Gehäuse sieht sehr schön aus und fasst sich gut an! Beim Umbau empfehle ich die originalen Knöpfe und Schrauben zu benutzen. Ich bin bei einem Preis von knapp 15€ von dem Ergebnis begeistert! PS:In dieses Gehäuse passt der Ersatzakku von OTB ohne jedes drücken und quetschen perfekt hinein.
M**N
Housing is ok for the price, as well as ...
Housing is ok for the price ,as well as screewdrivers. The problems is that i did not receive screws and other small parts + the "new" screen came in scratched.
J**E
No está tan mal, solo eso.
El acabado no decepciona demasiado, y no tiene restos de plástico, pero cuando la he abierto estaba rallada por una parte y algo sucia. Las piezas encajan bien aún que puede quedar una zona que no encaja del todo bien. Y los tornillos que venían no entraban correctamente así que he tenido que reciclar los de la carcasa original. Pero esto pasa con cualquiera de estas carcasas que busques por internet. No la recomiendo a no ser que la carcasa original que tengas esté muy mal (como a mí ya me pasaba)
O**C
Not great. A few problems
Not great. A few problems. One is that some holes are too big for the supplied screws to screw into, so can't securely re-assemble. Buttons are also much poorer in quality than original Nintendo ones.
L**A
Ottimo sostituto, uguale all'originale
Perfetto , ottimo per riparare il vostro vecchio game boy facile da montare dovete solo avere un minimo di pratica
Trustpilot
1 week ago
3 days ago