Description
🌡️ Master your environment with precision power — don’t let your setup fall behind!
- READY TO DEPLOY KIT - Includes a robust 40A SSR, K-type thermocouple sensor, and heat sink—everything you need to start controlling temps like a pro.
- PRECISION MEETS POWER - Built-in Auto-Tuning PID algorithm ensures ultra-accurate temperature control tailored to your environment.
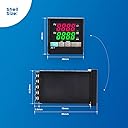
- INSTANT VISUAL FEEDBACK - Dual LCD windows display current temperature and setpoint simultaneously, eliminating guesswork.
- SMART ALARM INTEGRATION - Alarm relay output lets you connect buzzers or external alerts, so you never miss a critical temperature event.
- VERSATILE SENSOR COMPATIBILITY - Supports 2-wire & 3-wire sensors including K, J, N, W3-25, W5-26 thermocouples and PT100 for flexible applications.
This PID Temperature Controller Kit combines advanced Auto-Tuning PID algorithms with a dual-window LCD display to provide precise, real-time temperature management. Designed for professional-grade applications, it supports a wide range of thermocouples and sensors, includes a high-capacity 40A solid state relay, and comes complete with a K-type thermocouple sensor and heat sink. Ideal for millennial managers seeking reliable, versatile, and easy-to-integrate temperature control solutions.